Showing posts with label Beginners Guide to Gardening. Show all posts

3.20.2015

Gardening 101: Soil Preparation

There is one thing that is the most important step for a healthy garden.  It is your soil.  For beginning gardeners it tends to be something that is overlooked.  (I say this from personal experience my first year gardening).  

I want to take the complexity out of understanding your soil and help you improve it quickly and simply this spring!

Understanding your soil:  Your soil is the source of  nutrients giving life to your plants.  Healthy soil is alive and full of microorganisms and bacteria.  It has enough air space between the soil for water, air and plant roots to enter and it holds moisture and nutrients so that plants absorb them.  
The best soil will have 3% to 10% of organic matter.  Organic matter holds water and nutrients then releases it to your plants.  If you are working with your existing soil you will have either clay soil, sandy soil or loamy soil.  

1. Loamy soil is the ideal type to have (and rare).  It holds moisture and nutrients so that plant roots are able to absorb them.   

2. Clayey soil makes it hard for air, water and plant roots to be absorbed.  It dries slowly and drains poorly.  

3. Sandy soil allows air and plant roots to grow but also allows water to pass through rapidly.  It doesn't hold nutrients or moisture for long.
Two different ways to create your own compost: A compost tumbler and a simple chicken wire bin.
Whichever type of soil you have here is the secret: add organic matter (compost) to your soil and it will make a significant difference! 

Organic Matter: Compost is the most basic of all things you can add to your soil and the most beneficial.  It enriches your soil and allows nutrients to be provided to your plants for a long period of time.  It also provides the ability for the soil to hold moisture which is an outstanding attribute.  Another great benefit: When you use compost on your garden you won't need to use any other natural fertilizers!  
 You can use manure on your beneficial flower beds as long as you don't plan on eating any of your plants in them!
Application: Once a year in the spring apply a 1/3" or 1/2" layer of compost to your soil and mix it in with a shovel or rototiller.  

NOTE: Compost (organic matter from once living things) is different than manure (animal waste).  Don't use manure on your garden it can release ammonia which badly injures plants.  It can also harbor human pathogens.  Also E.coli can live in manure that is not composted for 21 months!

Read this post for Our Favorite Soil Mix (from SFGM)

3.01.2015

Gardening 101: Crop Rotation

It depends on where you live but at our house the snow is falling!  All this time inside with cold weather reminds me that very soon the snow will be melting and spring will arrive. Its hard to believe that its already March which means its time to plan the garden.  This simple  series:Gardening 101 should give you the basics you need to start a successful garden this year.
This my advice to prevent bacterial, fungal, soil quality issues and pest problems in 2015: Rotate your crops!  In simple terms that means: change the planting location of your vegetables each year.  More specifically avoid planting a crop in the same plant group in the same area each gardening season. Basically keep moving things around from year to year.
Bacterial and fungal diseases can overwinter in your soil!
  
INSTRUCTIONS FOR BASIC CROP ROTATION
STEP 1: Categorize your plants into 4 GROUPS
 1. Legumes: Beans, Peas, Peanuts, Cover Crops
 2. Leaf/ Flower: Lettuce, Spinach, Broccoli, Cabbage 
3. Fruiting: Tomatoes, Cucumbers, Peppers, Eggplant, Squash, Melons, Potatoes, Corn
4. Roots: Onions, Garlic, Carrots, Turnips, Beets, Radishes


STEP 2:  Get out some paper and draw the outline of your garden.  Plant a different plant group (family) in each bed. NOTE: If you only have 1 bed you can simply divide it into 4 sections and then rotate the sections every year.

STEP 3: Draw your garden plan for the next 3 to 4 years. Rotate your plants based on the progression below:
Legumes ---> Leaf ---> Fruiting ---> Root
                 (nitrogen fixing)       (both are nitrogen fixing)            (breaks up soil)
         (like loose soil) 
STEP 4: Save your crop rotation plan in a place you can find it for the following year!  The next step is to layout the specific plants within each group. (Look for my next post to learn about planning your specific layouts)

NOTE: If you want to use a more advanced crop rotation system you can group plants based on their botanical family instead of these 4 groups.  But I like to try and keep things simple!  That way we have time to enjoy moments like these....because time is precious!

1.24.2015

Choosing Heirloom Seeds

Its a very exciting time of the year at our house!  Our seed catalogs have arrived and its time to plan our garden for 2015.  In past years I have bought seeds at stores, and ordered a few from catalogs.  This year we have decided to revamp our process and buy all Heirloom seeds.  Why are we choosing to go this route?

1. Ability to save seed  
You can replant heirloom seeds (open pollinated) that you have saved from the previous year's crop because the plant remains stable in its characteristics. This is different from hybrids (which have been cross pollinated).  If you save hybrid seed you never know what you are going to get! 

2. Greater Flavor 
Most heirloom varieties have a richer flavor (especially tomatoes).

3. Seeds with history & stories 
Typically these seeds are pre-WWII or at least 50 years old.  They have been passed down from generations and I love that our children can learn these stories.  A beautiful way to bring life and knowledge to your garden.  

4. Variety  
Not only do you get greater flavor but an amazing selection in size, color, taste and culture.  Why not grow a white eggplant or a purple tomato?  At the same time you will discover a beautiful range in the plants you harvest. 
5. Discovery  
The plants you harvest will vary in fruit size, and timing of harvest.  Unlike a hybrid plant that produces fruit that is similar in size and has a predicable harvest time.

First I started by looking at the seeds we didn't use from last year (below) and started a list of what we would like to grow this year!  The next step is to make sure we are rotating our crops from the last couple years........

2.26.2014

Determining Your Best Planting Date (Part 2)


Now that you have figured out your Frost Free Date* what do you do with it?  I will let you in on a little secret....I found a simple chart where you just type in your Frost Free Date and everything else is figured out for you!!!  It tells you when to plant your vegetables.  No headaches and it saves you time. Here is the sample below with my planting dates for this year.

*NOTE: (If you don't know your Frost Free Date refer to my previous post here Determing Your Best Planting Date (In Spring) Part 1 )


This will be my third year using this chart and I love how it simplifies everything for me.  I didn't create this so I can't take any credit for it.  I found it on Pinterest and the rest is history!  Here is the chart on my Pinterest board called: Starting Plants Indoors from Seed. The Lazy Gardeners Seed Starting Chart Its from the website You Grow Girl.  You can download your own file for free and start using it right away.


Here are some of the great benefits of using this chart:

1. Simple: Just enter in your frost free date and your planting dates are automatically entered on the chart.  No need for you to do any calculations!
 
2. Staring Seeds Indoors: It tells you an early sow date or late sow date to start your seed indoors (if you choose to start your own and not buy transplants).

3. Direct Sow Outdoors: This is listed for plants that you just start from seed outside.  (These plants don't transplant well if you try to start them indoors from seed).

4. Choices of Planting Dates: You can choose either an early or late planting date.  Go with what works with your schedule.  If you miss the early then go with the late date.

2.20.2014

Indoor Seed Staring (Part 2)

PART 2: PLANTING SEEDS

Planting seeds indoors is easier than you may think. (I say this speaking from experience).  My favorite part is that your choices of vegetables can be endless.  Instead of selecting from a few plants in the spring at a greenhouse you can order seeds (or buy them at a store) and get the variety of vegetables you choose.

NOTE: Not all seeds will be started indoors.  Check the back of your seed packets for instructions.  Many seeds such as: beans, beets, carrots, corn, peas, radishes, spinach, and winter squash are to be directly sown outside on their planting date because they don't transplant well.

MATERIALS:
1. Seeds
2. Organic plant food
3. Plant labels (can be handmade)
4. Potting Mix (soil-less mix) *see below for mix
5. Heat Mat (optional)

STEP 1:  Clean trays with bleach solution. If you are re-using planting containers or yogurt cups make sure to clean them first using a 1 part bleach to 10 parts water.  Its very important that containers are disinfected! This helps prevent damping off which kills seedlings.  Let the containers dry thoroughly before using.

Cleaning plant trays

2.19.2014

Indoor Seed Starting (Part 1)

PART 1: Grow Lights & Stand Set-up


This is the second year that we have started our own plants indoors from seed.  We decided to do this because it saves us money and we know from the start that chemicals haven't been used on our seedlings.  

We use fluorescent lights because they are a cost effective way to provide warmth and light that the seedlings require. Incandescent bulbs will burn your plant.  You can also choose to purchase special grow lights for seed starting just keep in mind the higher cost. 

Fluorescent lights
You may be wondering if you can just put your seedlings by a window instead of buying lights.  The answer is that during the winter (when seeds are started indoors and sunlight is weak) you could use sunlight but you would also have to supplement that with artificial light. Vegetables require 6 to 8 hours of sunlight a day and they won't receive that in the winter.  If you choose to use a combination of sunlight and artificial light know that plants need to be under an artificial light for twice as long as they would need sunlight.

Below you will find the simple set-up we use and instructions on how to get started:

Timer, Heat Mat, Plant Food, Thermometer, & Plant Labels

2.13.2014

Determining your Best Planting Dates (in Spring) Part 1


I have to be honest with you, the first year we started our garden I bought peppers, onions and herbs and then went home and planted them all in the same day. (Gasp!)  I had no concept of a spring frost date or the understanding that different vegetables required different planting times. Believe it or not all our vegetables survived that year, but the next year I figured out I needed to make some changes. 


The keys points to determining when to plant in the Spring:

1.Frost free date- People who garden talk about the frost free dates.  This date is based on past years frost patterns and your location.  There are 2 different dates one for Spring (first frost) and the other for Fall (last frost).  Spring is the most critical date to start out the season.

Here are some websites where you can look up the estimated frost free dates for your area: 

Farmer's Almanac-  http://www.almanac.com
Natural Gardening Co.-  http://www.naturalgardening.com 
National Climatic Data Center-  http://www.ncdc.noaa.gov

2.07.2014

Building A Raised Bed


Cedar raised beds we built last year (2013)
 After 2 years of planting directly in the ground with no added soil, 4 green metal garden stakes, and a chicken wire fence we realized it was time for an upgrade. Moving forward we realized that we wanted to build something more permanent that would be a design that we loved and would last for years.  We also wanted to include a fence and a gate to keep out the animals and make it easier for us to access.

Why we choose Raised Beds: After I did my research we decided to invest in building some quality raised beds.  One of the articles we found that convinced my husband this was the way to go was from OSU's Horticulture and Crop Science Department.  Here is the article: Benefits to Raised Bed Gardening  I highly recommend reading this if you are trying to decide between raised bed gardening verses just planting in the ground.

Instructions for Building A Raised Bed: If you are interested in building your own raised bed I have included the link to Sunset's website: Your Guide to Making a Raised Garden Bed  This is how we built ours and they are amazing!  There are step by step instructions and great pictures to go along with the instructions.  

Materials for Sunset 4 x 8 Raised Bed:
(1) 6-foot-long 4-by-4
(6) 8-foot-long 2-by-6s
(1) 10-foot-long 1-inch PVC pipe
(2) 10-foot-long ½-inch PVC pipes
(32) 3½-inch #14 wood screws and 
(16) ½-inch #8 wood screws
(1) 4- by 10-foot roll of ¼-inch-mesh hardware cloth 
(8) 1-inch galvanized tube straps (semicircular brackets)
(32) cubic feet (1- 1/5 cu. yd.) soil mix*

Modifications we made to the design:  
1.  *I highly recommend using the Best Raised Bed Soil Mix from the Square Foot Garden Method (SFGM) that I wrote about in the previous post. Just click on the link above and you can find the instructions.

2. We wanted (5) hoops per bed as seen in our final picture below. (The original design called for 2).  Two hoops were not enough support for the row cover fabric.  So we added more tube straps and PVC pipe for this modification.

NOTE: The PVC hoops are used for Row Covers (special fabric that protects plants from frost and pests).  You can read more about them in this post: Using Row Covers

3. If you are interested in adding the Vertical Frame with the net (shown below) for growing vine crops vertically I explain how to build them in this post: Building Vertical Frame for a Raised Bed 
Our final raised bed design with (5) PVC hoops & added Vertical Frame in Pine bed. (Picture taken 1 year after construction).
My view on selecting lumber: We built (2) of our beds from untreated Pine and the other (2) from untreated Cedar.  We didn't feel comfortable using treated lumber when we were going to be eating the vegetables from the raised beds!
You can coat the boards with linseed oil or there is a product called  Eco Wood Treatment that is made of naturally occurring plant and mineral extracts.

Pine lumber: will be more cost effective and is readily available.  Pine will last approximately 10 years as a raised bed. 

Cedar lumber: is more expensive than Pine and can be harder to come across.  The major benefit is that it can last up to 30 years!  (Our Asparagus bed can last up to 30 years so that is why we built it out of Cedar).


Pre-made raised beds (shown above) are another option if you want to save time.
Keep in mind you can purchase pre-made raised beds at your local home improvement store or many are also available through gardening magazines.   

Do what works for you and get your raised bed ready for planting in early March or April of 2014!

2.06.2014

The Best Raised Bed Soil Mix (from SFGM)


If you have decided to build a raised bed for your garden then you are going to need soil to fill the bed!  There are so many benefits to building a raised bed versus planting in the ground and one of the positives is that you get to mix your own soil instead of having to "fix" the soil you have.  

This has been our favorite soil mix that we have shared with friends and family.  Vegetables love this mixture and its amazing how healthy they are!  

Bush Beans and Onions happy to be in good soil! (mid summer onion tops fall over allowing the bulbs to mature)

Amazing Soil Mix (our family favorite)
taken from: Square Foot Garden Book (80's version) 
by Mel Bartholomew


Ingredients: 
1 bale of peat moss: 6 cu ft
1 large bag of course vermiculite: 4 cu ft 
10 pails (2 1/2 gallon size) of sand: 3 cu ft
2 pails of wood ashes and charcoal*  

*(we left both of these items out)
10 pails (2 1/2 gallon size) of compost: 3 cu ft
1 coffee can full of lime
1 coffee can full of organic fertilizer
TOTAL volume of mixture: 16 cu ft.

This amount will fill one garden block to a depth of 12 in or two blocks to a depth of 6 in.


Mixing Procedure:
1. Mix all ingredients with a flat bottom shovel. (We mixed little by little in the raised bed....or you can mix it on a hard surface and then move it to the bed).


2. Spray with a hose to dampen the materials (don't soak) as you mix the pile.
 

3. Fill garden block with mixture turning over to mix it well.  Again spray with hose as you mix.

4. Level and add enough additional mixture to fill the raised bed, level again spray once more with hose, and the block is ready for planting.  

NOTE : If you want to simplify this process you can also purchase Mel's Mix Square Potting Soil on Amazon.    

Raised Bed complete with soil and ready to plant!

2.04.2014

The Secret in the Garden

You may be wondering what could be such a big secret in a garden?  Soil.  For beginning gardeners it tends to be something that is overlooked.  (I say this from personal experience my first year gardening).  

I want to take the complexity out of understanding your soil and help you improve it quickly and simply this spring!


Understanding your soil:  Your soil is the source of  nutrients giving life to your plants.  Healthy soil is alive and full of microorganisms and bacteria.  It has enough air space between the soil for water, air and plant roots to enter and it holds moisture and nutrients so that plants absorb them.  


The best soil will have 3% to 10% of organic matter.  Organic matter holds water and nutrients then releases it to your plants.  If you are working with your existing soil you will have either clay soil, sandy soil or loamy soil.  

1. Loamy soil is the ideal type to have (and rare).  It holds moisture and nutrients so that plant roots are able to absorb them.   

2. Clayey soil makes it hard for air, water and plant roots to be absorbed.  It dries slowly and drains poorly.  

3. Sandy soil allows air and plant roots to grow but also allows water to pass through rapidly.  It doesn't hold nutrients or moisture for long.


Two different ways to create your own compost: A compost tumbler and a simple chicken wire bin.
Whichever type of soil you have here is the secret: add organic matter (compost) to your soil and it will make a significant difference! 

Organic Matter: Compost is the most basic of all things you can add to your soil and the most beneficial.  It enriches your soil and allows nutrients to be provided to your plants for a long period of time.  It also provides the ability for the soil to hold moisture which is an outstanding attribute.  Another great benefit: When you use compost on your garden you won't need to use any other natural fertilizers!  

 You can use manure on your beneficial flower beds as long as you don't plan on eating any of your plants in them!
Application: Once a year in the spring apply a 1/3" or 1/2" layer of compost to your soil and mix it in with a shovel or rototiller.  

NOTE: Compost (organic matter from once living things) is different than manure (animal waste).  Don't use manure on your garden it can release ammonia which badly injures plants.  It can also harbor human pathogens.  Also E.coli can live in manure that is not composted for 21 months!

Read this post for Our Favorite Soil Mix (from SFGM)

1.24.2014

Building a Vertical Frame for a Raised Bed

Also all plants that vine (cucumbers, peas, squash, vine beans and vine tomatoes) are grown using a vertical frame at the end of the raised bed (which saves a tremendous amount of space).  Add a vertical frame at the north end of your raised bed. I will expand on growing vertical crops & how to build your frame in the next post!  - See more at: http://followingthemastergardener.blogspot.com/#sthash.pAwPQwKR.dpuf
How do you maximize the use of small space for your Square Foot garden?  Gardening Vertically allows you to grow more food in less space! Below you can find out how to building your own vertical frame which is a great addition to a garden.

The most popular garden vegetables: pole beans, cucumbers, tomatoes and squash are typically vine crops that sprawl all over the garden if they are not planted vertically.  If you want to grow these crops and still have room for other vegetables in your garden I recommend building a vertical frame. 

Other positives to using vertical growing are: simplified watering, improved harvest (leaves exposed to circulating air and sunlight = less disease), visible pest control, less soil preparation, and adding an attractive visual backdrop to your garden.


Our Raised Beds with Vertical Frames
HOW TO BUILD YOUR OWN VERTICAL FRAMES

Materials for (1) vertical frame for a 4 foot wide raised bed:
(2) 1/2" EMT tubing (comes standard in 10' lengths)
(1) 3/4" EMT tubing (to receive the 1/2" EMT frame sides)
(2) 1/2" 90 deg EMT elbows
(1) 1/2" EMT straight connector
(2) 3/4" conduit straps/clamps
(2) 1" screws
Garden Netting


Peas growing on Vertical Frame

 STEP 1:  Determine the height of your vertical frames. (Vine crops should grow to 6 or 7 feet in height). We decided on 7 feet. Keep in mind 1 foot of the EMT tubing will be in the ground.  So we determined: 
7 ft (height) + 1 ft (in ground) = 8 ft length per side

1.16.2014

Planning your Garden Layout using SFGM

The simple way to plan your garden layout is to pick up a pencil and paper and start drawing!  That's it.  You don't need a computer program, an app, or special sketching skills.  Those things are tools that you can use, but that are not required. 


This year we have chosen to simplify our planning process so I will show you how we are planning in six easy steps!

STEP 1: Draw the outline of your garden.  
I will draw one of our 4 x 8 size raised beds for example. 
Typically if this is your first year gardening I would recommend starting with a 4 x 4 raised bed. 

Vertical Frames at the end of the raised beds

Also all plants that vine (cucumbers, peas, squash, vine beans and vine tomatoes) are grown using a vertical frame at the end of the raised bed (which saves a tremendous amount of space).  Add a vertical frame at the north end of your raised bed. Here is a link to my other post on Building A Vertical Frame for a Raised Bed

Drawing outline of garden

12.31.2013

Starting your own garden in 2014!

I wanted to start out the New Year with a Beginners Guide to Gardening.  I am keeping it simple and attainable for all of you who want to try digging in the dirt this Spring! 


I personally think that gardening is amazing because you design your garden around your individual needs!  You can start a small garden for little cost and effort and great rewards. Before seed packets start arriving at your local stores take some time to do the 4 steps below to prepare to garden in 2014!


STEP 1: Choose a sunny location
Take a look at your yard, deck, patio, and flower beds.  Where would be the best location for your garden?  Choose the location that gets at least 6 hours of sunlight a day (preferably 8 hours). From 9am to 4pm is when the sun is at its peak intensity which is the best time for your garden to receive light.  You can alter the other factors for your garden but this one is a consideration that can't be changed. 

My other suggestion is to keep the garden in view from inside your house.  That way you remember to water, check and monitor pests on a regular basis.  Then you are also able to look at your plants growing daily.
Raised bed garden
STEP 2:  Choose the type of garden:
Container gardening , planting directly in the ground, building a raised bed, growing vertically and more!
Bush Zucchini plant grown in a container on the deck
You don't have to start with raised beds.  Our first year (2010) I had a small 4' x 4' bed with a metal chicken wire fence around it (see picture below of compost pile which used to be my garden!)  It was cheap and easy to construct.  It also gave me the confidence that I could grow plants which then inspired us to expand the garden.  So starting small is smart.  That way you have time to learn and figure out what you like to grow, adjustments to make for the future and your favorite style of gardening. Doing a little research now before the spring will get you prepared.
Our first 4' x 4' garden (behind the compost tumbler) it now serves as our leaf pile.
STEP 3: (The secret is out) The better your soil the better your garden
Out of all the steps this is the most important (other than sun) to the success of your garden.  I would not recommend just going out to your backyard and loosening up the soil and planting.  You can do that if you choose and you can also add different matter to this soil to improve it.  Just keep in mind this typically takes about 6 years of work which is a significant time requirement.

Your garden needs well drained, loose, light, nutrient rich soil full of organic matter.  This is one of the main reasons that we selected the raised bed garden over just planting directly in the ground.  When you build a raised bed you have a smaller area to fill with soil.  You can buy all the ingredients for your perfect soil and then mix them together into the raised beds.  There are different options for soil mixes so research this area to decide what you want.  Here is our favorite soil mix that I have shared with my friends and family: 

Our Favorite Soil Mix
taken from: Square Foot Garden (80's version) 
by Mel Bartholomew
Ingredients: 

1 bale of peat moss: 6 cu ft
1 large bag of course vermiculite: 4 cu ft  (get this at hardware store)
10 pails (2 1/2 gallon size) of sand: 3 cu ft
2 pails of wood ashes and charcoal  (we left both of these items out)
10 pails (2 1/2 gallon size) of compost: 3 cu ft
1 coffee can full of lime
1 coffee can full of organic fertilizer
TOTAL volume of mixture: 16 cu ft. 

(This amount will fill one garden block to a depth of 12 in or two blocks to a depth of 6 in.)

Mixing Procedure:
1. Mix all ingredients with a flat bottom shovel. (We mixed little by little in the raised bed....or you can mix it on a hard surface and then move it to the bed).


2. Spray with a hose to dampen the materials (don't soak) as you mix the pile.
 

3. Fill garden block with mixture turning over to mix it well.  Again spray with hose as you mix.

4. Level and add enough additional mixture to fill the raised bed, level again spray once more with hose, and the block is ready for planting. 


Bush Green Beans
STEP 4: Grow only vegetables you enjoy eating
This should be obvious, but when you first start out select vegetables that are easy to grow and that you really love.  You won't ever find parsnips, radishes, or beets in our garden because we just don't eat them.  Some vegetables my family has had great success growing are: basil, bush beans, eggplant, parsley peppers, squash and tomatoes. 
Beefsteak Tomatoes
 The very first year we started we simply grew peppers and herbs in the 4' x 4' square.  I had read that peppers were relatively disease resistant, good producers and low maintenance!  I simply bought several different types at our local nursery and planted them a foot apart.  Then in the front of the bed I planted parsley, cilantro and basil.  I planted one tomato plant in a pot on our deck and that was it!
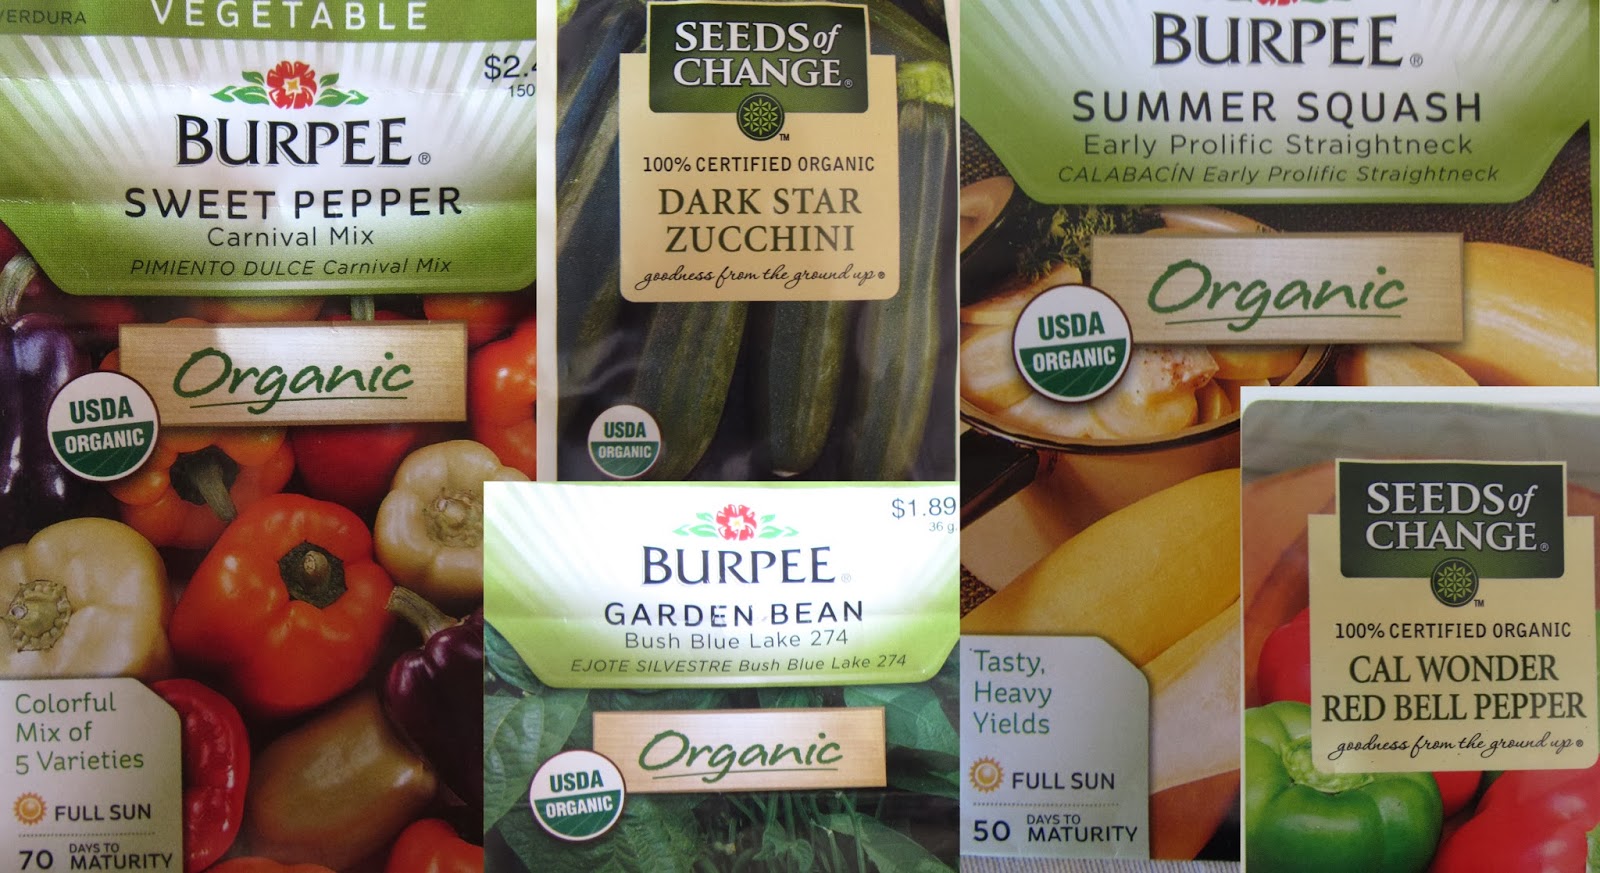
Sweet Pepper (Carnival Mix)
Now is the perfect time to start planning your new garden for 2014.  Its cold outside and you have time to prepare.  You also have time to research.  I have several book suggestions you may want to check out under: Favorite Gardening Books

Take a look at these simple steps in the next month or so and I will expand on other tips and considerations!


STEP 1: Choose a sunny location

STEP 2:  Choose the type of garden

STEP 3: The better your soil the better your garden

STEP 4: Grow only vegetables you enjoy eating
Until then enjoy welcoming in the New Year!